Pre-Placement Questionnaire
Process for Pre-Placement in myCority for Recruiters/Recruiting Managers
FOR RECRUITERS - myCority
Important information for recruiters – Please read prior to creating a new employment registration for a new candidate on myCority
The New Employment Registration questionnaire should be completed by recruiters when the employer requires Occupational Health clearance for a new starter. The recruiting manager is defined by myCority as the manager who adds the new starter to myCority. Thus clearance records for candidates are only visible to the manager who adds the data to myCority.
By following all steps within this process on myCority the candidate will receive emails giving them access to their own new myCority account. This enables the candidate to complete and submit their new starter health questionnaire directly to Occupational Health via the Cority system.
Please ensure all the information provided within this process is correct including:
• Correct spelling of all names
• Correct personal email address (this cannot be changed during this process so the candidate must provide an email address they plan to continue using).
• Preferred telephone number
Please have the candidate’s job description available to attach to the record you create. It is strongly recommended that you complete this whole process and then submit. Saving the record with insufficient details can mean you cannot return to edit at a later date.
Please monitor your recruiter dashboard regularly view to check on the status of the candidate’s health clearance. After 90 days, regardless if a candidate is cleared or not cleared, their data will be removed from the My Applicants tab. This is because a decision regarding an applicant being cleared, or not, is typically reached within this timeframe and also supports compliance with data regulations. Consequently, recruiters should check dashboard views for updates and download clearance advice promptly as it will not be accessible after 90 days from data being added.
Recruiters are also advised to check with candidates that they have received the emails from the myCority system including checking their spam/junk folders. Candidates receive a personal e-link to their own myCority account, their specific username and password via email.
17 Steps
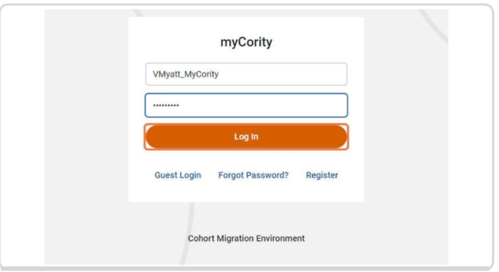
STEP 1: Using your Username and Password, log in to myCority
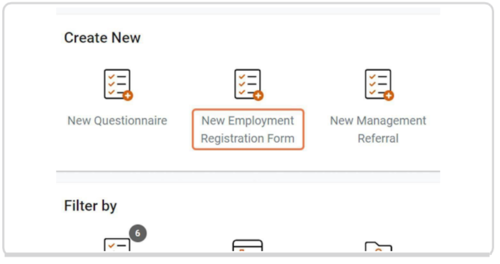
STEP 2: Click on New Employment Registration Form
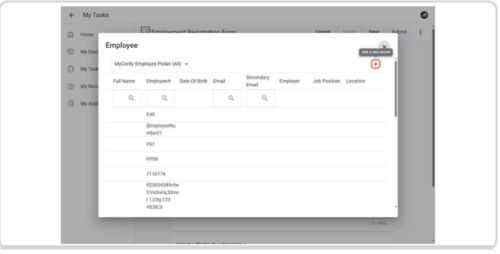
STEP 3: Click on the "Search for an Employee"
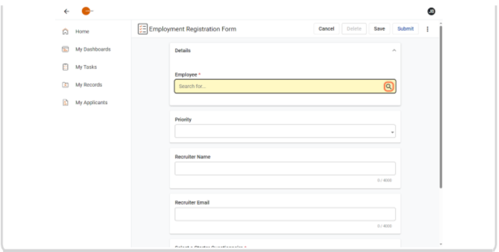
STEP 4: Click on + "Add a new record"
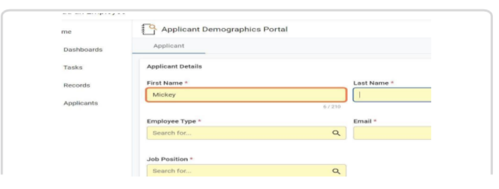
STEP 5: Enter all the details for the applicant including personal (not work) email address and preferred phone number
Choose the closest post title match from the list or choose unknown if necessary. If directorate, site and department are not applicable or unknown, select “unknown” from the drop down list
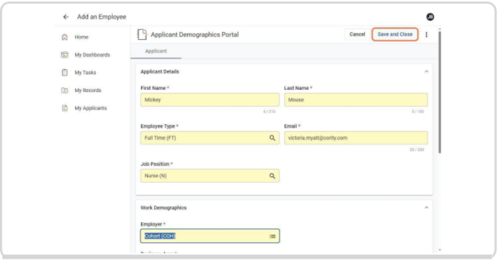
STEP 6: When all required fields are complete, click on "Save and Close"
STEP 7: The data will be saved and the employee record will appear on the Employment Registration Form
Do not click save again at this point as your information will be lost. Continue to update the mandatory fields as required.
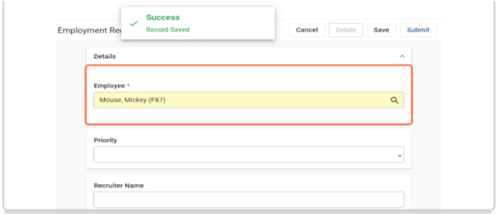
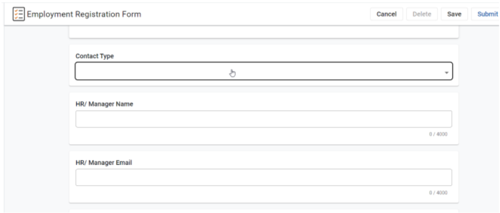
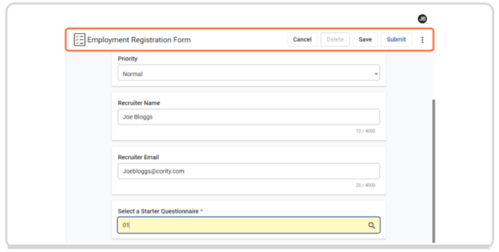
STEP 8: Update all mandatory fields including recruiter details in Contact Type and recruiter email address
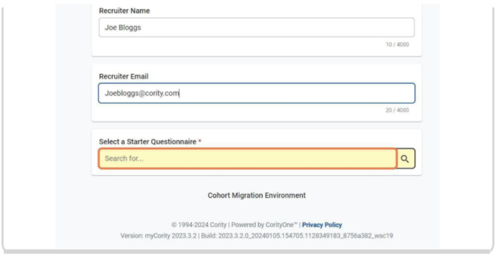
STEP 9: Select the relevant New Starter Questionnaire (GCC_PPQ) from the look up field
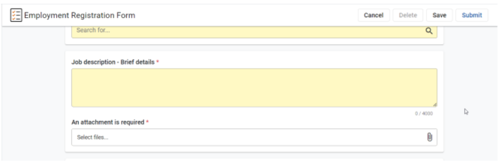
STEP 10: Provide brief relevant details of job role. You can clarify the job title here if you did not find a suitable match earlier in this process. Attaching a job profile/job description is a mandatory step at this point and must be completed.
STEP 11: If absolutely required, at this point only, you can save and come back to an applicant.(Select Save). However it is strongly recommended to complete the entire process and then submit.
STEP 12: To pick up any saved applicants click on my Tasks and select Incomplete
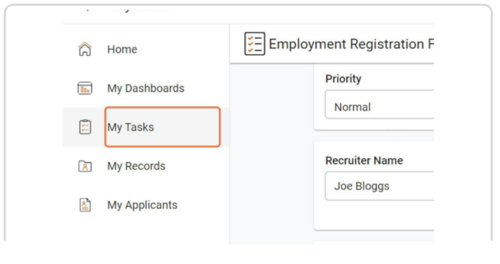
If no records are visible at this point click the filter (orange dot) in the top right hand corner and untick assigned to me.

You can then click on the questionnaire you need to complete and submit.
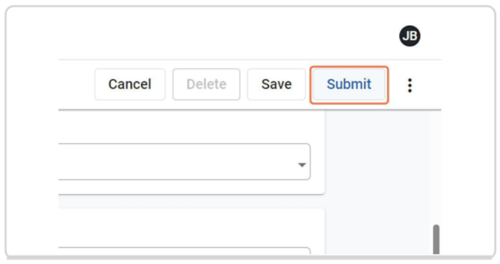
STEP 13: When all fields have been completed,and job description attached, and you are ready to send to the applicant, click on "Submit"
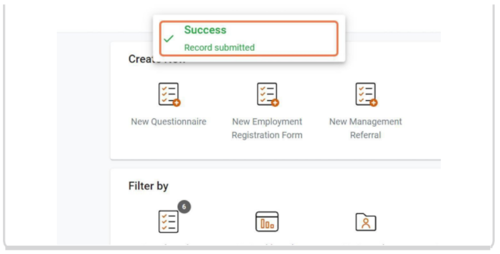
STEP 14: You will see a message confirming the record has been submitted
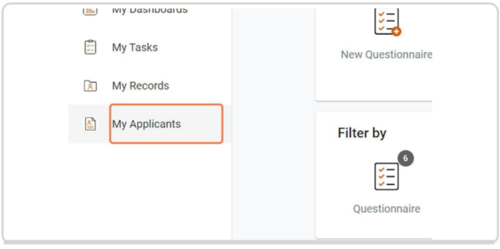
STEP 15: Check your dashboard regularly to check on the status of applicants. To view progress of applicants, click on "My Applicants" from the menu
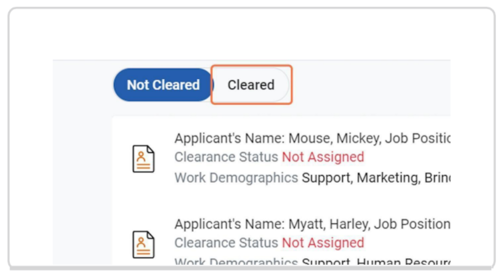
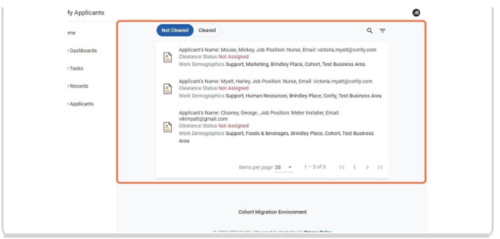
STEP 16: The applicants will be listed under "Not cleared" or "Cleared" depending on current status
If there are delays or suggested adjustments, these will list on the applicant record
STEP 17: Remember to check your dashboard view regularly to check on the progress of applicants.
Click on My Applicants, Cleared, to view applicants that have a clearance outcome.
To view the clearance certificate click on the icon next to the applicant’s name. On viewing the clearance certificate, it can be exported to a PDF by clicking on the 3 dots in the top right hand corner.
It is recommended that this clearance information is downloaded promptly by the recruiting manager due to the 90 day retention period which is built into the myCority system. After 90 days applicant pre-placement advice is removed from the myCority account and thus is not accessible.
myCority access cannot be shared between managers. The recruiting manager is defined by myCority as the manager who adds the applicant to myCority.